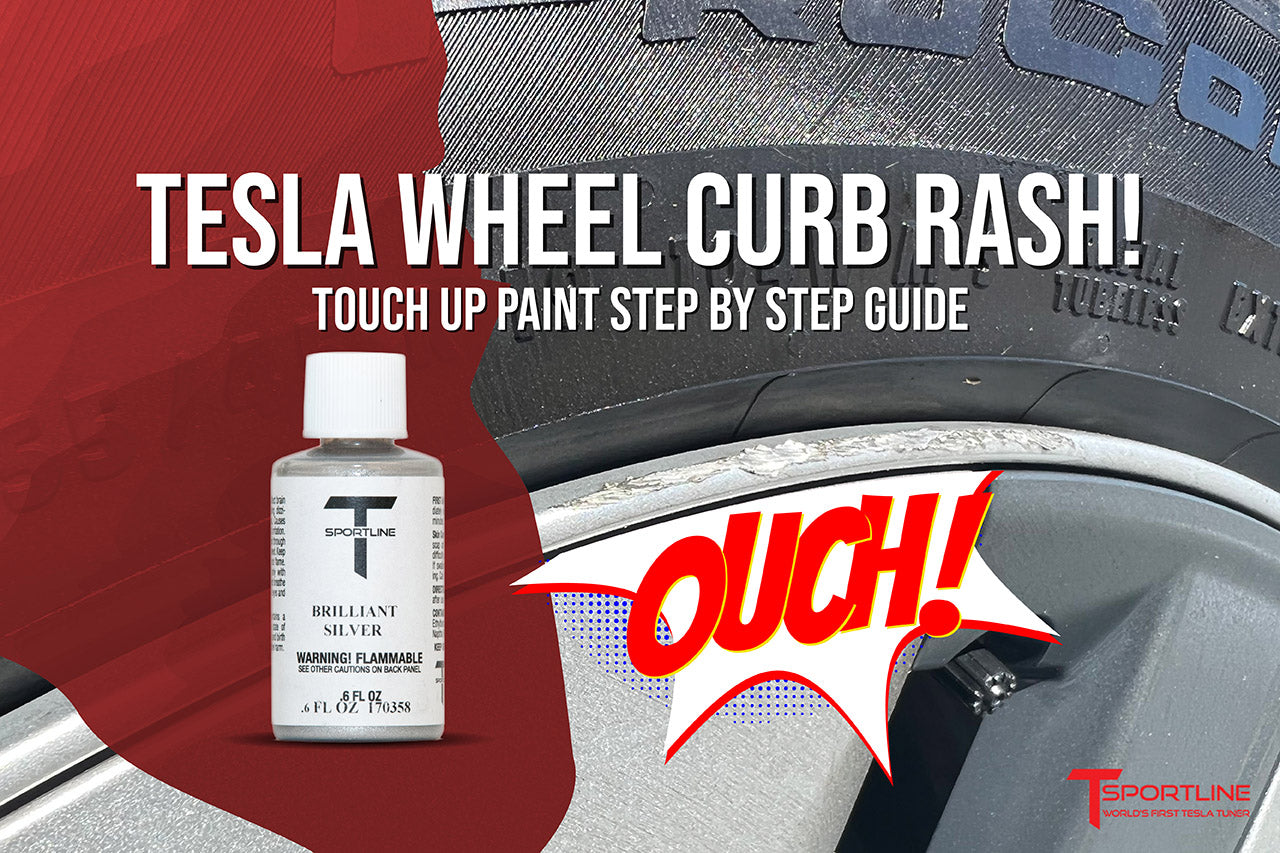

When Curbs Get Carried Away
Click to see the T Sportline Tesla Wheel Touch Up Paint
How to touch up your T Sportline Tesla Wheels
We live in an increasingly busy world and sometimes, our vehicle’s wheels get rubbed the wrong way because of it. Whether it’s the at the fast-food drive-through or at the school pickup line, curbs can mar our wheels and create a blemish on an otherwise pristine exterior. Fear not, though, as T Sportline is here with a DIY tutorial on how to make quick repairs to minor curb rash.

Of course, T Sportline can certainly sell you replacement wheels if that’s the way you want to roll, but sometimes a simple touch-up can be good enough. With that in mind, T Sportline offers its Tesla Wheel Touch Up Paint in various colors, including Aero Wheel, Gunpowder Gray, Brilliant Silver, Satin/Onyx Black, Metallic Gray, Space Gray, Gloss Black. The paint is properly formulated to a heavy duty, industrial specification suitable for use on automotive wheels. T Sportline Wheel Touch-Up Paint is intended for use on small scratches, dings, and minor curb rash. For major curb damage, we recommend professional wheel refinishing or wheel replacement.
Before you begin your DIY repair, you’ll want to collect the necessary supplies. Gather yourself some car wash or dish soap, degreaser and/or wax remover, lint-free shop towels, duct tape, a file or sandpaper for metal, and perhaps some acetone. And as with any sort of painting, you’ll want to consider the ambient air temperature. For this repair, you’ll want something between 65-85 degrees F to give you a good working and dry time, and avoid performing the repair in direct sunlight, as it will heat up the wheel and paint and reduce your working time.

Surface Preparation
Step one in your curb rash repair process is to thoroughly clean the wheel and tire. You can use car wash soap, but dish soap is probably a better option to remove greases and waxes. As surface prep is everything in painting, you can’t be too careful, so going over the freshly washed wheel and tire with a dedicated grease and wax remover as well is recommended. If you have tire dressing on the tire, be sure to clean that off, as you’ll need to apply duct tape to the tire to prevent it from getting scuffed during the repair and painted during the refinishing process.

To make it easier to get to and work the surface, rotate the wheel to get the desired repair area positioned at 12 o’clock. Evaluate the damaged area. If the damage is beyond just using the touch-up paint alone, you can apply some duct tape to the tire to prevent scuffing the tire with the file or sandpaper, as well as getting paint on it.
Looking at the damaged area now, if you see jagged or sharp edges, you’ll want to start with the metal file to smooth out the surface.

As you begin to smooth the surface, be careful not to create flat marks on the wheel, unless of course the damage is on a flat part of the rim. Chances are, though, that the damage is on the rounded lip, and the idea here is to restore that shape. After that, you can continue to dress the surface with 80-, 120-, and then 180- or 200-grit sandpaper to smooth out the surface further and remove the deeper scratches.
Once you have the wheel’s surface to the desired finish, you’ll want to hit the wheel and tire once more with the wax and grease remover and lint-free towels. If you have compressed air handy, you can use that to make sure the surface is free of any loose particles and dry. Ensure that there is no moisture between the rim and the tire, as that can contaminate the paint during application.
If you haven’t already employed it, use the duct tape to mask off the tire. Another trick is to use index or spare business cards tucked in the joint.

Applying Paint
Before you begin any painting job, it’s important to make sure that the paint is mixed up properly. Paint in general is made up of a number of different materials that can fall out of suspension after sitting for a period of time, so be sure to shake up the touch-up paint before using it. The T Sportline Touch Up Paint is visible through the gap in the label so you can make sure it is mixed sufficiently.

Now, use the brush inside the cap to carefully apply paint over the repaired area. Your first coat should be relatively thin to create a base layer to work with. Then allow 10-15 minutes of drying time before applying subsequent coats of paint. As you apply additional coats, continue to thinly apply the product.
If any paint has extended beyond the desired repair area, it can be removed by carefully wiping it off using a microfiber towel that has been dampened with paint thinner. If you’ve masked the tire using duct tape or index cards, carefully remove them once the paint has dried. The paint will be fully dry within 24 hrs—actual drying time depends on temperature and humidity. It is best not to drive on the wheel until the paint is fully dry, to avoid any impacts to the repair area. We recommend not washing the repair area for at least 5 days after repair to ensure complete curing.

Storing Extra Touch-Up Paint
Once you’re done applying the touch-up paint, be sure to clean the threaded area of the touch-up paint bottle of any paint. Any residual paint left on the threads will act like glue, making the cap nearly impossible to loosen in the future. T Sportline recommends storing your touch-up paint indoors, out of direct sunlight, and preferably in temperatures below 60 F or over 85 F.
Your wheel should be looking tip top now, but if you still haven’t tackled the task yet, you can check out T Sportline’s YouTube instructional video right HERE to watch how it’s done in real time.