
Click to see T Sportline Carbon Fiber Mud Flaps for Model S
Click to see T Sportline Carbon Fiber Mud Flaps for Model 3
Click to see T Sportline Carbon Fiber Mud Flaps for Model X
Click to see T Sportline Carbon Fiber Mud Flaps for Model Y

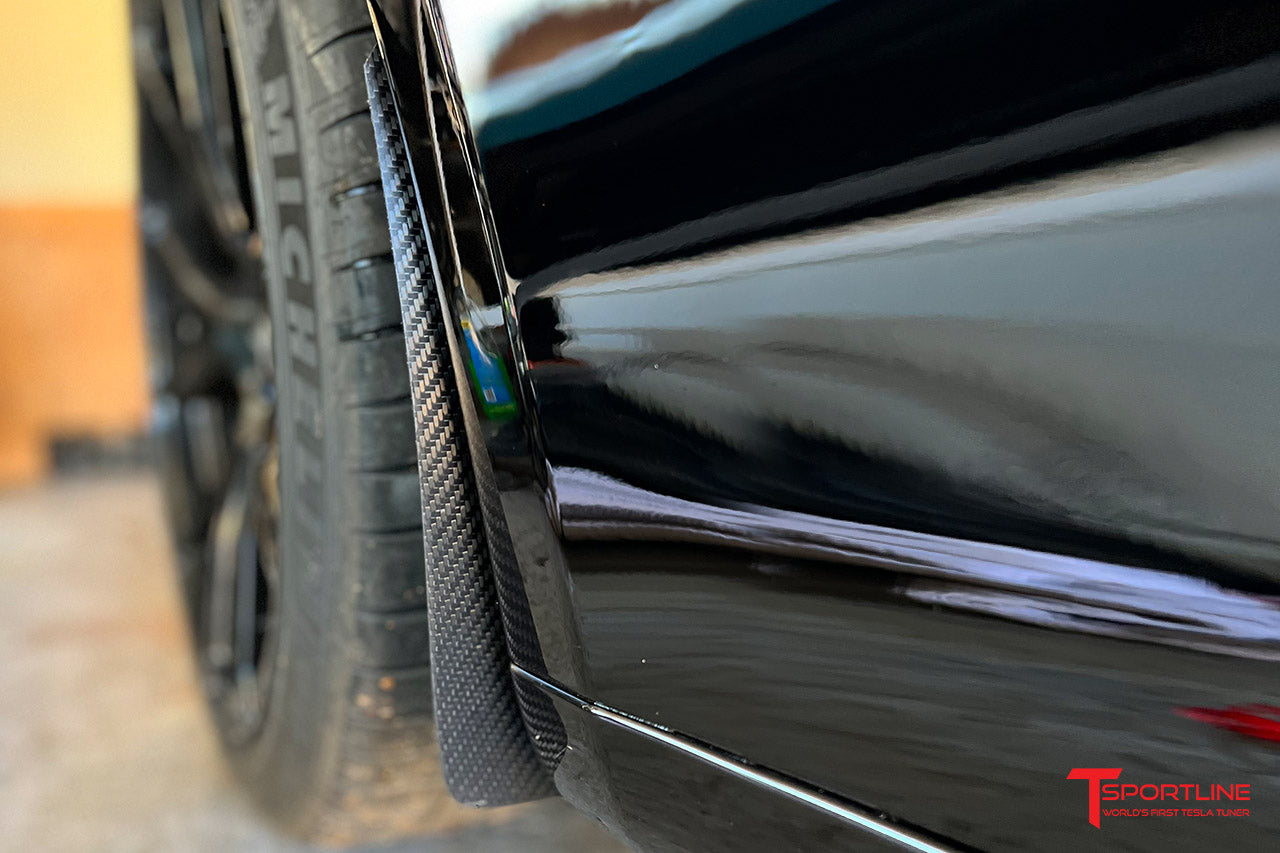
The T Sportline Carbon Fiber Mud Flap fit in Matte finish for Model S includes one mud flap for each wheel corner, a microfiber towel for surface prep cleaning, and an adhesion promoter packet. The mud flaps are custom designed and shaped specifically for precision fitment to the Model S and are made in the USA from aircraft-grade carbon fiber.


The wheel-facing side of the mud flap is finished with an OEM-quality road and rock guard textured black finish, which will provide rugged durability against debris kicked-up from the tires. The backside of the mud flap is protected with matte finish PPF (protection film) to preserve the carbon fiber.

The Mud Flap carbon fiber weave nicely matches the factory Tesla Model S Plaid spoiler weave, which is also a matte finish. OEM-grade automotive spec doubled-sided body panel adhesive tape comes pre-installed on the T Sportline Mud Flaps.

While lifting the car is not necessary for installation, it does make it easier. Before lifting a Tesla, be sure to enable ‘Jack Mode’ from the dash.

To lift a Tesla without damaging the underside, use the T Sportline Jack Pucks.


Behind the front wheels and in front of the rear wheels, Tesla jack locations are noted as the rubber pads with 3 holes as show. The T Sportline Jack Pucks press into the center hole.


The T Sportline Jack Pucks simple press into place and the o-ring secures the puck on the car.


Align the floor jack lifting pad with the T Sportline Jack Puck as shown. The vehicle can be lifted to the desired height. Do not go under the vehicle for any reason, and never unless appropriate Jack Stands are installed first.


Thoroughly wash the inner wheel well surface. The surfaces where the Mud Flap attach must be as clean as possible. Any dirt, grime, tar, tire polish, etc must be completely removed. Once the surface is clean, allow the surrounding area to thoroughly dry. Do not use the ‘adhesion promoter’ towelette for cleaning. It will be used as the very last step, right before attachement of the Mud Flaps.

First mock-up the Mud Flap by holding it in position. The Mud Flaps can be installed with the upper section extending slightly beyond the fender (outbound mount) or with the upper section lining up flush with the fender (inbound mount). The position is discretionary, decide which positioning you like best, viewing the Mud Flaps from various angles.

Once the desired Mud Flap mounting location is confirmed, mark the position by attaching a piece of tape on the fender at the edge of the Mud Flap as shown. The edge of the tape will serve as a guide for attaching the Mud Flap. The tape will be pulled off after installing the Mud Flaps. Repeat this surface cleaning, Mud Flap mock-up fitment and tape marking for all 4 corners.

Now that all 4 corners are prepared, open the adhesion promoter pack and carefully wipe the fender wheel well lip surfaces where the Mud Flap attachment tape will be installed. Repeat this for all 4 corners of the car. Next, starting with the driver-side rear Mud Flap, peal the attachment tape backing about halfway down as shown.

To permanently attach the Mud Flap, start by positioning the bottom of the Flap in the desired location (with the red attachment tape still intact on the bottom of the Mud Flap). With the bottom of the Flap in place, carefully line up the outer upper edge of the Flap with the fender, watching to maintain the outbound/inbound positioning as desired. Next, apply the top of the Mud Flap to the vehicle. Press firmly and hold the top of the flap in place to allow the attachment tape to connect and bond. Once the top is securely attached, pull the red attachment tape backing off the bottom of the Flap, and carefully apply the bottom of the Mud Flap to the vehicle. Once installed, press and hold firmly the Flap to the fender to make sure the attachment tape is connected and bonded securely. Repeat for the Passenger side rear Mud Flap.


The front Flaps are secured with both attachment tape and the factory push pin. The push pin must first be removed by prying the center pin out. A flat bade screwdriver can be used to pry the center pin out, as shown. Retain the push pin, it will be reused.

The front installation is similar to the rear, with the addition of the push pin. First mock-up the driver side front Mud Flap into the desired position and mark the fitment on the fender with guide tape. The next step on the front is to install the push pin into the Mud Flap (keep the center pin extended). The red attached tape backing can again be pealed half-way down as shown. The push pin should be re-installed (with the Mud Flap) on the vehicle. After carefully lining up the upper edge of the Mud Flap, the red tape can be complete removed and the Mud Flap pressed into final place.


Once installed, press and hold firmly the Flap to the fender to make sure the attachment tape is connected and bonded securely. Repeat for the Passenger side rear Mud Flap.
Click to see T Sportline Carbon Fiber Mud Flaps for Model S
Click to see T Sportline Carbon Fiber Mud Flaps for Model 3